









Pipe Sizing Explained: A Homeowner’s Practical Guide

TL;DR:
- Proper pipe sizing ensures adequate water flow and pressure for household fixtures, preventing problems like noise, pressure loss, or sediment buildup. Using fixture unit counts, pipe run length, and pipe schedules guides the correct diameter selection, with velocity and pressure drop considerations influencing long-term pipe health. Overestimating pipe size can cause sediment issues, while undersizing leads to noise and erosion, making precise calculations essential for system efficiency.
Pipe sizing is the process of selecting the correct pipe diameter to deliver the right flow rate and pressure to every fixture in your home. Get it wrong in either direction and you pay for it. Too small and you get noise, pressure loss, and worn pipes. Too large and water moves too slowly, letting sediment settle inside. Standards like IPC Table 604 and typical residential pressures of 40–80 psi give you a reliable framework to start from. This guide breaks down how to explain pipe sizing in plain terms, so you can plan your next plumbing project with confidence.
How do industry standards and fixture units guide pipe sizing?
The International Plumbing Code (IPC) does not size pipes by guessing. It uses a fixture unit (FU) system, which converts each plumbing fixture into a standardized demand number. IPC Table 604 assigns each fixture a value: a toilet equals 3 FU, a kitchen sink equals 2 FU, and a washing machine equals 4 FU. You add up all the fixture units on a branch or main line, then cross-reference that total with your longest pipe run to find the minimum required diameter.
Longer pipe runs demand larger diameters. Pressure drops as water travels through pipe, and a longer run means more friction loss. IPC Table 604.4 accounts for this directly. A system with 20 total fixture units on a 40-foot run may need a smaller pipe than the same 20 FU on a 100-foot run. This is why pipe size calculation is never just about the number of fixtures.
Pipe material also matters when you compare sizes. Copper, PEX, and CPVC all have slightly different inner diameters even at the same nominal size. Copper runs slightly smaller on the inside than PEX at the same trade designation. That difference affects actual flow capacity, so always check the manufacturer’s dimension chart for the material you are using.
- Toilet: 3 fixture units
- Kitchen sink: 2 fixture units
- Washing machine: 4 fixture units
- Bathroom lavatory: 1 fixture unit
- Bathtub or shower: 2 fixture units
Pro Tip: Add up your total fixture units for the entire branch before picking a pipe size. A single undersized section anywhere on that run creates a bottleneck for every fixture downstream.
When your system has multiple bathrooms, a laundry room, and a kitchen all on one main line, the fixture unit total climbs fast. That is when consulting a licensed plumber before you buy materials pays off. Complex systems with high FU totals and long runs can exceed what standard residential pipe sizes handle comfortably.
What is the relationship between flow velocity, pipe diameter, and water quality?
Flow velocity is the speed at which water moves through a pipe, and it directly affects both water quality and pipe longevity. Design velocity for residential pipes sits in the 1–2 m/s range for comfortable, efficient operation. That range keeps water moving fast enough to stay clean but slow enough to avoid damaging the pipe walls.
Two failure modes sit on opposite ends of the velocity scale:
- Too slow (below 0.6 m/s): Sediment and mineral deposits settle inside the pipe. Over time, this narrows the bore and reduces flow. It also creates conditions where bacteria can grow in standing water pockets.
- Too fast (above 3 m/s): Water hammers, vibration, and noise become noticeable. High velocity also erodes pipe walls and fittings, especially at bends and joints, shortening the system’s life.
The concept of self-cleansing velocity is the minimum speed needed to keep sediment moving through the pipe rather than settling. Self-cleansing velocity sits at approximately 0.6 m/s (about 2 ft/s). This is the single most overlooked factor when homeowners oversize pipes. A pipe that is one size too large can drop velocity below this threshold and create sediment problems within a few years.
Velocity also connects directly to pressure drop. Faster water creates more friction against the pipe wall, which increases pressure loss over the run. Balancing velocity and pressure drop is the core challenge of understanding pipe dimensions in any residential system.
Pro Tip: After calculating your minimum pipe diameter, check the resulting velocity. If it falls below 0.6 m/s, your pipe is too large for that section. Size down to the next standard diameter and recheck.
How do nominal pipe size (NPS) and pipe schedules affect actual pipe dimensions?
Nominal Pipe Size (NPS) is a trade designation, not a measurement. NPS does not match the actual inner or outer diameter of a pipe, particularly for sizes under 14 inches. A 1-inch NPS pipe does not have a 1-inch inner diameter. The actual inner diameter depends on the pipe schedule.
Pipe schedules define wall thickness. Schedule 40 has a thinner wall than Schedule 80 at the same NPS. A thicker wall means a smaller inner bore, which reduces flow capacity. This table shows how the same NPS produces different inner diameters across schedules:
| NPS (inches) | Schedule 40 inner diameter (inches) | Schedule 80 inner diameter (inches) |
|---|---|---|
| ½ | 0.622 | 0.546 |
| ¾ | 0.824 | 0.742 |
| 1 | 1.049 | 0.957 |
| 1¼ | 1.380 | 1.278 |
| 1½ | 1.610 | 1.500 |
The difference between Schedule 40 and Schedule 80 at ½-inch NPS is 0.076 inches of inner diameter. That gap is small in absolute terms but significant at low flow rates. Choosing Schedule 80 where Schedule 40 is sufficient wastes money and reduces flow capacity for no benefit in a standard residential system.
Always verify the actual inner diameter from a pipe schedule chart before finalizing your pipe size calculation. Buying based on NPS alone is one of the most common sizing mistakes homeowners make.
How to calculate and apply pipe sizing for a home plumbing project?
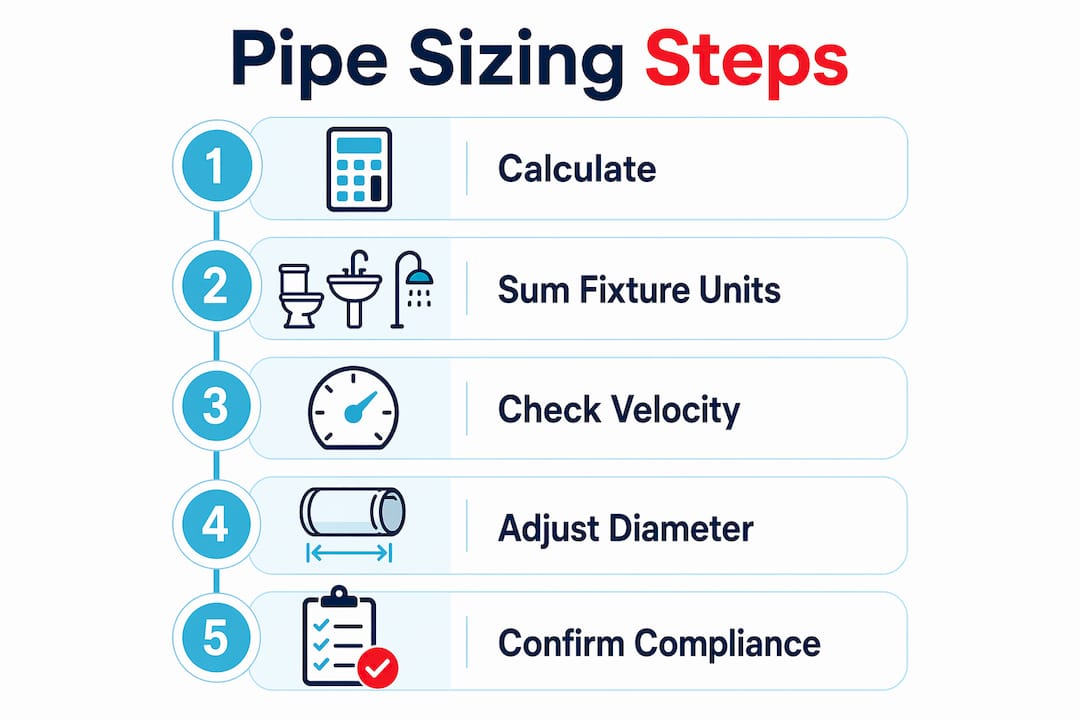
Pipe sizing for a home project follows a clear sequence. Work through these steps and you will arrive at the correct pipe diameter for each section of your system.
- Count fixture units. List every fixture on the branch or main line. Assign FU values using IPC Table 604. Add them up.
- Measure the longest pipe run. Measure from the water meter or main shutoff to the farthest fixture. This is your critical path for pressure loss.
- Add 10–20% for fittings. Elbows, tees, and valves add resistance equivalent to extra pipe length. A 40-foot run with several elbows behaves like a 48–50-foot run in pressure loss terms. Neglecting this step leads to overestimating flow capacity at the fixture.
- Check available pressure. Residential supply pressure typically runs 40–80 psi. Subtract the pressure required at the fixture (usually 8–15 psi for most fixtures) and the pressure lost to elevation changes. The remainder is your allowable pressure drop over the pipe run.
- Select pipe diameter. Use your total FU count and adjusted pipe run length to look up the required diameter in IPC Table 604.4. Round up to the next standard size if your calculation falls between two options.
- Verify velocity. Calculate the expected flow velocity at the selected diameter. Confirm it stays between 0.6 m/s and 3 m/s.
Here is a practical example. A bathroom addition adds a toilet (3 FU), a lavatory (1 FU), and a shower (2 FU), totaling 6 FU. The run from the main line is 35 feet. Add 20% for fittings and the adjusted run is 42 feet. At 60 psi supply pressure, a ½-inch pipe delivers about 4 GPM while a 1-inch pipe delivers about 18 GPM. For 6 FU on a 42-foot run, a ¾-inch supply line is typically sufficient. Sizing up to 1 inch is unnecessary and risks dropping velocity below the self-cleansing threshold.
Calculations must account for friction factors, fittings, and total system pressure, not just basic diameter formulas. Skipping any of these steps produces an overly optimistic estimate that fails under real conditions.

Pro Tip: Always check your local plumbing regulations before finalizing pipe sizes. Minimum diameter requirements for supply lines and drain pipes vary by jurisdiction and can override your calculations.
What common mistakes do DIY homeowners make when sizing pipes?
Improper pipe sizing produces two distinct failure patterns: oversized pipes that accumulate sediment and undersized pipes that create noise and erosion. Both are avoidable with the right approach.
- Oversizing the main supply line. Bigger is not always better. A pipe that is one size too large drops water velocity below the self-cleansing threshold, allowing sediment and mineral scale to build up inside the bore.
- Undersizing branch lines. A branch line that is too small creates turbulent flow. You hear it as banging or whining when a tap opens. Over time, turbulence erodes fittings and joints.
- Ignoring equivalent length from fittings. Every elbow, tee, and valve adds resistance. Skipping the 10–20% adjustment for fittings means your actual pressure at the fixture is lower than your calculation predicted.
- Neglecting pressure drop over long runs. A pipe that works fine over 20 feet may deliver inadequate pressure over 80 feet at the same diameter. Always calculate pressure drop for your actual longest run.
- Using NPS as the actual diameter. Ordering pipe based on the nominal size without checking the schedule leads to flow capacity errors, especially when switching between Schedule 40 and Schedule 80.
Pro Tip: Keep a copy of the DIY plumbing tools checklist before starting any pipe work. Having the right measuring and cutting tools on hand prevents the kind of rushed decisions that lead to sizing errors.
Water and gas systems use different sizing methods. Water systems focus on pressure drop and flow velocity, while gas systems prioritize pressure drop over the longest run at a specific pressure. Never apply water pipe sizing logic to a gas line.
Key Takeaways
Correct pipe sizing requires matching pipe diameter to fixture unit load, flow velocity, pipe run length, and available pressure. Getting any one of these wrong creates problems that are expensive to fix after the walls are closed.
| Point | Details |
|---|---|
| Use fixture units, not guesswork | IPC Table 604 assigns FU values per fixture; total FU and run length determine required diameter. |
| Keep velocity in the 1–2 m/s range | Below 0.6 m/s causes sediment buildup; above 3 m/s causes noise and pipe erosion. |
| NPS is not the actual diameter | Always check the pipe schedule chart to find the real inner bore before ordering materials. |
| Add 10–20% for fittings | Elbows and valves add equivalent pipe length; skipping this step overestimates pressure at fixtures. |
| Bigger pipe is not always better | Oversized pipes drop velocity below self-cleansing levels and create long-term sediment problems. |
Why I stopped trusting “just go bigger” pipe advice
The most common advice homeowners get from well-meaning friends is to size up. “Use the bigger pipe, you’ll have better pressure.” I spent years watching that advice backfire. A homeowner in a two-story house upgraded his main supply from ¾-inch to 1-inch thinking it would fix weak shower pressure. Six months later, he had a sediment problem in the 1-inch line because the velocity had dropped below the self-cleansing threshold. The real issue was a partially closed shutoff valve, not the pipe size at all.
The lesson I keep coming back to is this: pipe sizing is a system problem, not a single-pipe problem. You cannot fix pressure by changing one section without understanding what the rest of the system is doing. Flow velocity, pressure drop, fixture unit load, and pipe run length all interact. Change one and you shift the others.
The IPC fixture unit method exists precisely because it forces you to think about the whole system. It is not bureaucratic overhead. It is a practical tool that encodes decades of real-world plumbing failures into a lookup table. Use it.
My honest recommendation for any homeowner tackling a bathroom addition or kitchen remodel: do the fixture unit count first, measure your longest run, add the fitting allowance, and then look up the diameter. That sequence takes 20 minutes and saves you from a call to a plumber six months later. If your total FU count exceeds 30 or your run exceeds 60 feet, bring in a professional for the final check. The math gets complex fast, and the cost of a consultation is far less than ripping out finished walls.
— Renate
Pipes, fittings, and tools for your next plumbing project
Getting your pipe sizing right starts with having the correct materials on hand before you begin. Santehnikasveikals carries a full range of plumbing supplies including pipes, fittings, valves, and installation tools suited to residential DIY projects and professional builds alike.
Whether you are running a new supply line for a bathroom addition or replacing aging pipes in a kitchen, the right diameter pipe and quality fittings make the difference between a system that performs for decades and one that needs attention within a year. Santehnikasveikals delivers across Latvia, so you can order the exact sizes and materials your project requires without making multiple hardware store trips.
FAQ
What does pipe sizing mean in residential plumbing?
Pipe sizing is the process of selecting the correct pipe diameter to deliver adequate water flow and pressure to every fixture in a home. It uses fixture unit counts, pipe run length, and available pressure to determine the minimum required diameter.
What is a fixture unit and why does it matter?
A fixture unit (FU) is a standardized demand value assigned to each plumbing fixture under IPC Table 604. Totaling the FU values for all fixtures on a line determines the minimum pipe diameter needed to serve them.
Why does a larger pipe sometimes cause problems?
A pipe that is too large drops water velocity below the self-cleansing threshold of approximately 0.6 m/s. At that speed, sediment and mineral deposits settle inside the pipe, narrowing the bore over time.
What is the difference between NPS and actual pipe diameter?
Nominal Pipe Size (NPS) is a trade designation that does not match the real inner or outer diameter of a pipe. The actual inner diameter depends on the pipe schedule, with Schedule 80 having a smaller bore than Schedule 40 at the same NPS.
How do fittings affect pipe sizing calculations?
Elbows, tees, and valves add resistance equivalent to extra pipe length. Adding 10–20% to your measured pipe run accounts for this equivalent length and prevents overestimating pressure at the fixture.
Atstājiet komentāru