









































Shower Tray vs. Tiled Shower Floor: How to Choose
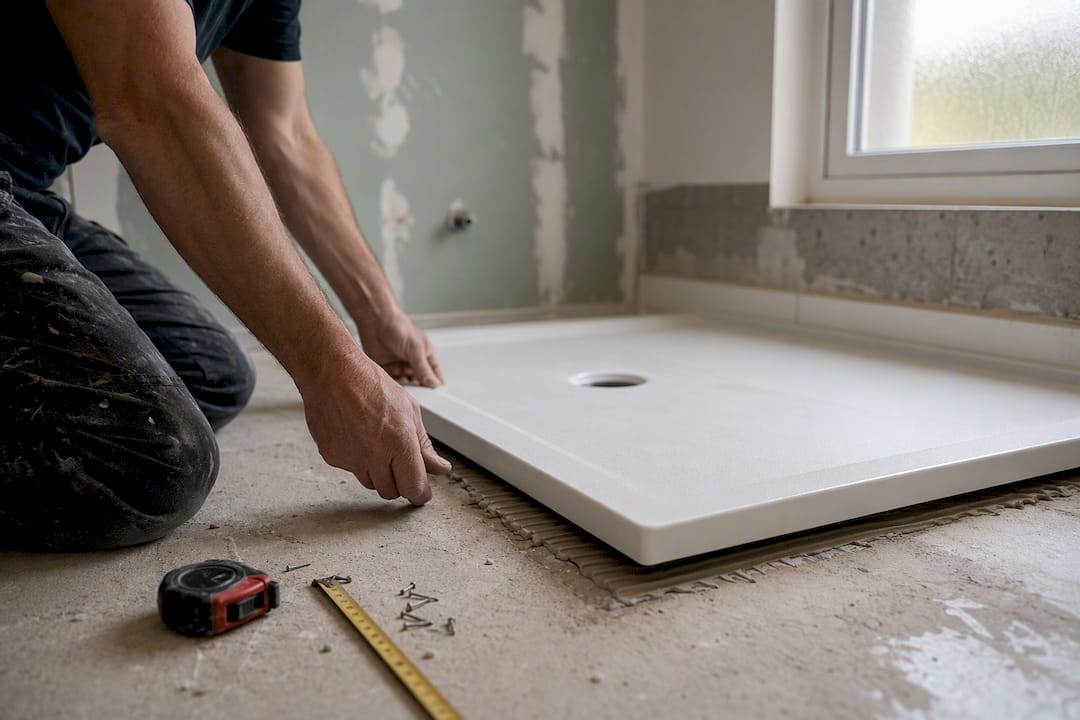
Choose a shower tray when budget, speed, and predictable waterproofing matter most; choose a tiled floor when you want a custom, seamless look and are prepared for higher cost, longer installation, and stricter workmanship demands. The right call depends on four factors: your budget, how accessible the floor needs to be, how confident you are in the installer’s waterproofing skill, and how much design freedom you actually want.
TL;DR:
- Shower trays are faster and more cost-effective to install, with built-in waterproofing, but they offer limited customization and shape options.
- Tiled floors provide a seamless, high-end look with flexible drain placement and design but require meticulous waterproofing, longer installation, and higher maintenance.
- Proper installation of both options is critical: trays need level support and correct sealing, while tiled floors depend on precise falls, waterproof membranes, and seasoned workmanship.
- Durability and maintenance costs vary more with installation quality; well-done tiled floors can outlast trays but are more prone to hidden failures if improperly installed.
- Accurate measurement, matching drain types, and understanding subfloor conditions are essential before purchasing materials, especially for long-term reliability and warranty validation.
Table of Contents
- Shower Tray vs. Tiled Floor: Pros and Cons at a Glance
- How Do You Decide Between a Shower Tray and a Tiled Floor?
- What Does Installing a Shower Tray Actually Involve?
- What Does a Tiled Shower Floor Involve Underneath the Tiles?
- Which Option Lasts Longer and Costs Less to Maintain?
- Reading Product Specs Before You Buy
- Renate’s Take: Match the Choice to the Bathroom, Not the Trend
- Where to Find the Right Materials for Either Option
- Sources
Shower Tray vs. Tiled Floor: Pros and Cons at a Glance
A shower tray is preformed and factory-sealed, so it arrives with its waterproofing built in rather than assembled on-site by hand. A tiled shower floor is built in layers, on-site, by whoever is holding the trowel that day. That single difference explains almost every trade-off on this list.
Shower tray advantages:
- Faster installation, often finished in a single day once plumbing is roughed in
- Lower labor cost because there’s no screed, membrane, or tile-setting labor involved
- Inherently waterproof base construction straight from the factory, with fewer joints that can fail
- Predictable material waste and pricing, since it’s one unit rather than dozens of cut tiles
Shower tray drawbacks:
- Limited size and shape options compared to a custom tiled floor
- A visible edge or lip where the tray meets the tiled walls, unless you choose a low-profile model
- Fewer drain placement choices, since the waste position is usually fixed by the tray’s design
Tiled floor advantages:
- Seamless, wall-to-wall look with no visible tray edge
- Full control over tile size, pattern, and drain placement, including linear drains
- Works with underfloor heating far more naturally than most trays
Tiled floor drawbacks:
- Requires a full waterproofing membrane, correctly formed falls, and precise tile-setting to avoid leaks
- Takes several days longer, since screed needs to cure and membrane needs to set before tiling starts
- Higher long-term maintenance unless you specify epoxy grout, since standard grout stains and needs periodic resealing
If you’re renovating a rental unit or a bathroom on a tight schedule, a tray usually wins. If you’re doing a one-time high-end renovation where the shower is the visual centerpiece, a tiled floor earns its cost.
How Do You Decide Between a Shower Tray and a Tiled Floor?
Work through these questions in order. Each one narrows the decision further, and by the fourth or fifth question most homeowners already know their answer.
- What’s your budget bracket, and are you trying to save on labor or materials? Trays save mostly on labor; tiled floors let you control cost by choosing cheaper tile, but the installation labor stays high regardless.
- What’s under your current floor? Concrete slabs limit where you can route waste pipes without breaking into the slab, which favors a tray with a shallow riser kit. Timber subfloors give you more flexibility for either option.
- How much downtime can your household tolerate? A tray installation might take a day or two. A tiled floor, done properly with membrane cure time, often takes five to seven days from demolition to first use.
- Does anyone in the household need step-free access? Wet rooms and curbless showers almost always mean a tiled floor, since trays are hard to install flush with the surrounding floor.
- Do you want a linear drain or a point drain, and does your tile size support it? Large-format tiles need more precise fall geometry to reach a point drain without visible lippage, which is one reason many tiled installations now default to linear drains.
- How much ongoing maintenance are you willing to do? If resealing grout lines every year sounds like a chore you’ll skip, that alone might settle the decision in favor of a tray or an epoxy-grouted tile floor.
Pro Tip: Before you get quotes, measure the rough opening where the shower will sit and check ceiling height below if you’re on an upper floor. A shallow riser tray can save you from having to raise the entire bathroom floor to fit a standard-depth tray.
What Does Installing a Shower Tray Actually Involve?
Tray material is the first decision, and it determines almost everything else about performance. Acrylic trays are the lightest and cheapest, but thin acrylic can flex underfoot over time. Stone resin and solid-surface trays are heavier, stiffer, and generally more durable, which matters because flexing is one of the main causes of seal failure at the tray edges. Fiberglass sits in between: light and affordable, but it’s the material most likely to develop a hollow, flexible feel if it isn’t fully supported underneath.
Installation follows a consistent sequence regardless of material:
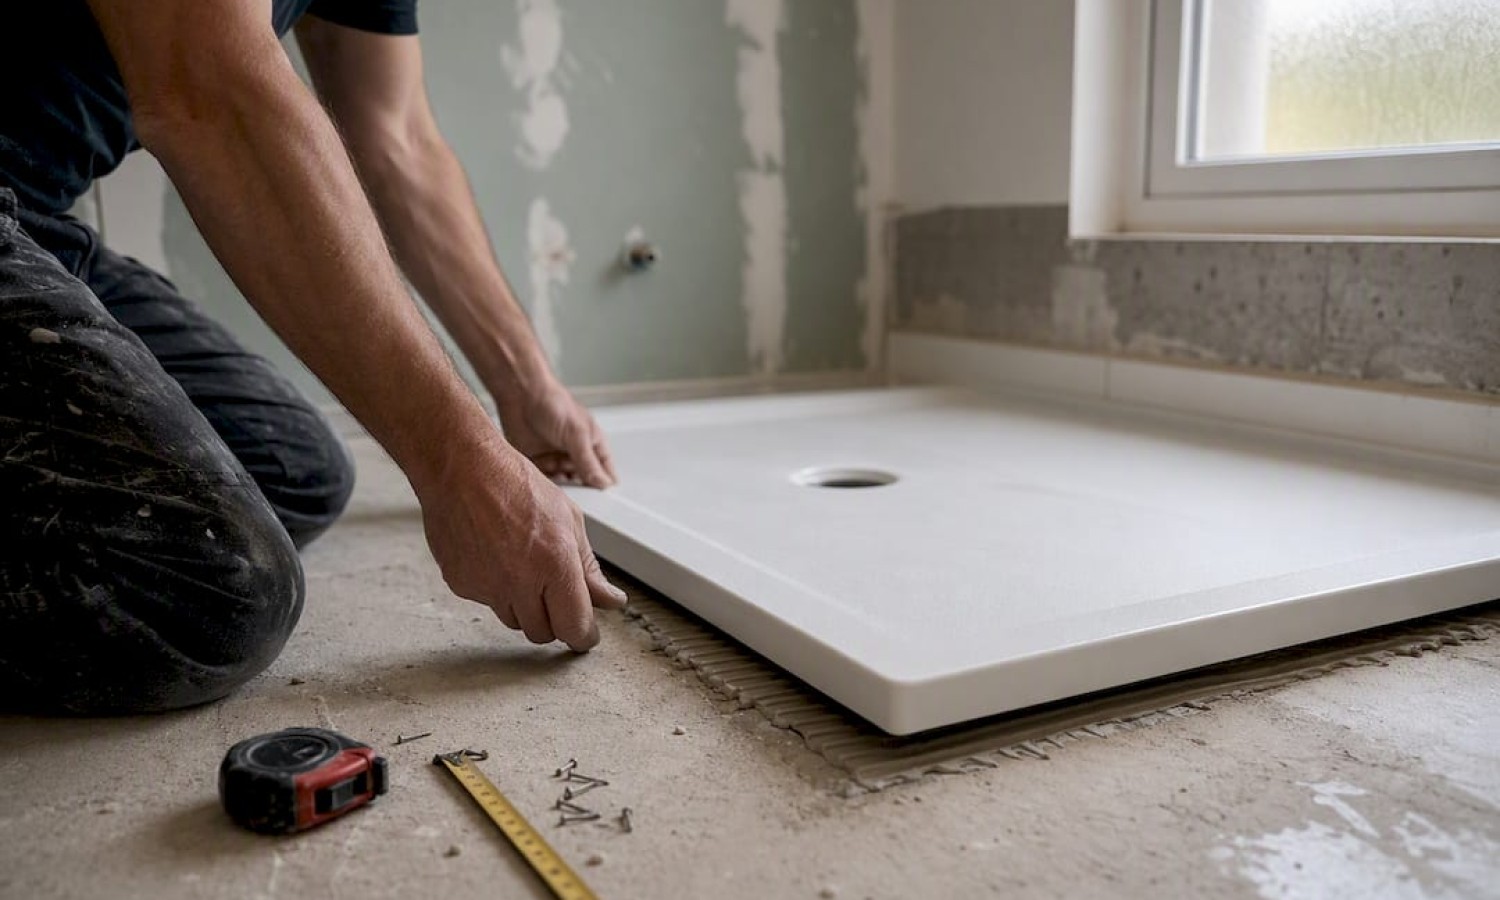
- Level and prepare the subfloor, checking for any dips that would leave the tray unsupported in spots
- Set the tray on its support legs or a mortar bed, confirming it sits dead level in both directions
- Connect the waste to the drain, testing for a leak-free seal before anything else goes on top
- Apply a continuous silicone bead where the tray meets the walls and any adjoining tile
- Fit the shower screen or enclosure once the tray and waste connection are confirmed solid
A preformed tray reduces the number of skill-dependent steps compared with a tiled floor, which is exactly why trays carry lower leak risk on average. Most tray failures trace back to three things: a flexing base that eventually cracks the seal, a rushed waste connection that weeps slowly instead of leaking obviously, or a thin, inconsistent silicone bead that homeowners later try to patch themselves. Forum threads on Latvian renovation sites regularly show the same complaint: a gap opening up between the tray and the wall months after installation, usually because the original sealant job was too thin or the tray wasn’t fully supported underneath.
If your subfloor has limited depth, low-profile trays paired with a shallow riser kit let you avoid raising the whole bathroom floor. Homes with more depth to work with can use standard riser height, which makes future waste access easier if a repair is ever needed.
What Does a Tiled Shower Floor Involve Underneath the Tiles?
A tiled shower floor is really four separate systems stacked on top of each other, and each one has to be done correctly for the whole thing to hold water. Get the order or the details wrong on any layer and the finished floor can look perfect while quietly leaking behind the wall.
The build-up starts with either a screed bed (a sand and cement mix sloped by hand) or a preformed sloped tray designed to sit under tile. On top of that goes a waterproof membrane, applied either as a liquid coating or a sheet membrane bonded across every seam and corner. Only once that membrane is fully cured does tiling begin, followed by grouting.
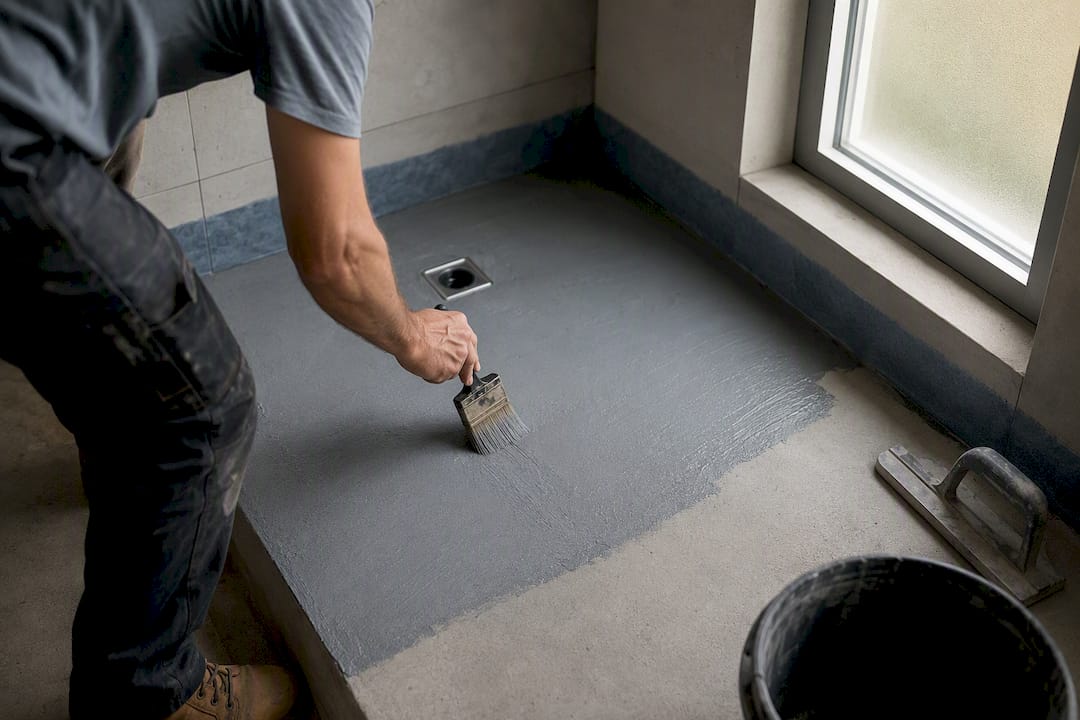
Falls toward the drain typically run in the range most plumbers describe as a gentle, steady slope rather than a dramatic pitch, just enough that water doesn’t pool anywhere on the floor. Getting this wrong is one of the most common tiling mistakes: a flat spot even a few millimeters off will collect standing water every time, and it’s not something you can fix without pulling the tile back up.
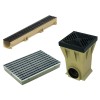
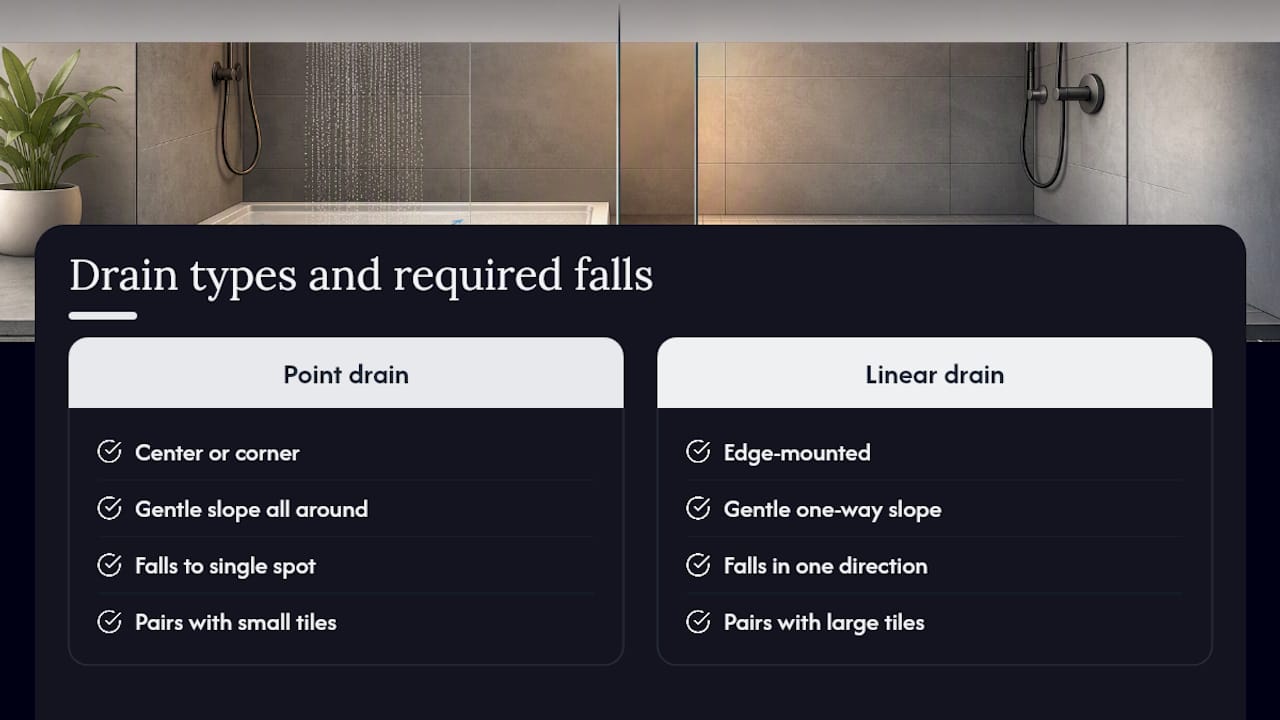
Drain choice affects the whole layout. A point drain sits in the center or corner and needs falls running from all directions toward that single spot, which gets harder to execute cleanly as tile size increases. A linear drain runs along one edge and only needs a fall in one direction, which is why larger-format tiles pair more naturally with linear drains than with a center point drain.
Grout choice matters more than most homeowners expect. Standard cementitious grout is porous and needs resealing on a regular schedule to resist staining and mold. Epoxy grout costs more upfront but is essentially non-porous, which makes it the better long-term choice for anyone who doesn’t want to reseal grout lines every year or two.
Pro Tip: Ask any contractor quoting a tiled floor to confirm in writing whether they’re using a liquid or sheet membrane, and ask them to flood-test the shower pan before tiling starts. A flood test catches leaks while they’re still cheap to fix.
Because there are more layers and more places for error, tiled floors genuinely need an experienced installer who understands waterproofing standards, not just tile-setting. This is the one area where cutting corners on labor cost tends to cost far more later.
Which Option Lasts Longer and Costs Less to Maintain?
Trays need less routine attention: wipe down the surface, check the silicone seal at the tray edge once or twice a year, and replace that seal every few years as it ages. Tiled floors need grout inspected regularly for cracks or wear, and if you went with standard cementitious grout, resealing on a recurring schedule to keep it from staining or harboring mold.
Repairs differ in scope too. A cracked seal on a tray is a same-day fix. A cracked tile or a failed grout line on a tiled floor can mean lifting several tiles to reach the membrane underneath, which is a far bigger job than it looks from the surface. A tray with a failed waste connection sometimes means replacing the whole unit if the connection can’t be reached from below.
Lifespan ranges vary more with installation quality than with material choice. A well-installed stone-resin tray can last well beyond a decade. A poorly sealed acrylic tray might need attention within a few years. Tiled floors, done right with proper falls and a sound membrane, can outlast the tray option entirely, but a rushed installation can fail behind the tile within a year or two, invisibly, until it shows up as a stain on the ceiling below.
As a rough budgeting rule, set aside a moderate portion of your original installation cost every few years for maintenance and minor repairs on either option. It’s a wide range because so much depends on how well the original job was done.
Reading Product Specs Before You Buy
Product pages carry more useful information than most homeowners think to check. When you’re comparing trays, look specifically at four fields: material, profile height, waste type, and the warranty term. A shallow profile height matters if your subfloor is limited; the wrong waste type means an incompatible drain connection discovered mid-installation, which nobody wants.
Santehnikasveikals, including material and profile height, so you can match a tray to your site conditions before ordering rather than after. A Vispool tray listing, for example, shows exact dimensions and material grade so you’re not guessing at fit.
Before ordering, confirm three things: the waste type matches your existing plumbing, the installer’s support requirements (legs, mortar bed, or riser kit) fit your subfloor, and you keep the installation instructions on file, since most manufacturer warranties require proof of correct installation.
Renate’s Take: Match the Choice to the Bathroom, Not the Trend
For a rental property, a tray wins every time. Speed and predictable cost matter more than a custom look nobody will notice between tenants. For a busy family bathroom, I’d lean tray again, mainly for the lower repair risk if a seal ever fails. For an accessible bathroom with step-free needs, a tiled floor is close to unavoidable. For a genuine high-end renovation where the shower is a design feature, a tiled floor with a linear drain and epoxy grout is worth the extra week of work.
Before calling a contractor, check three things yourself: the depth available below your current floor, whether your subfloor is level, and where your existing waste pipe actually sits. Those three answers will steer half the conversation.
— Renate
Where to Find the Right Materials for Either Option
Santehnikasveikals stocks what both projects actually need, without forcing you to guess whether a product fits your bathroom’s constraints. Whichever direction you choose, the difference between a smooth installation and a callback repair usually comes down to whether the materials matched the site conditions in the first place.
If you’re leaning toward a tray, the shower tray catalog lists material, profile height, and waste type on every product page, so you can match a tray to a shallow subfloor before you buy rather than after installation day. If you’re going tiled, drainage fittings and WC and waste connectors need to match your chosen drain style and pipe routing exactly, since a mismatched waste connector is one of the most common causes of a mid-project delay.
Before you order anything, measure your rough opening, decide on tray material or tile size, and confirm waste type against your existing pipework. If you’re unsure which spec fits your bathroom, browse the bathroom fixtures range or reach out to Santehnikasveikals for technical support before you commit to a purchase.
Sources
- Shower Tray vs. Tiled Shower Floor
- What Is a Shower Tray: Types, Costs & 2026 Guide
- Shower base vs. tiled shower floor: costs, pros & cons
Recommended
- Advantages of Modern Sinks for Your Home Renovation | Santehnikasveikals.lv
- The Role of Drainage Slopes in Property Water Management | Santehnikasveikals.lv
- Step by Step Interior Plumbing Design for Homeowners | Santehnikasveikals.lv
- Why Upgrade Old Radiators: Efficiency and Savings | Santehnikasveikals.lv
Palikite komentarą