










Concealed Cisterns: What They Are and How They Work
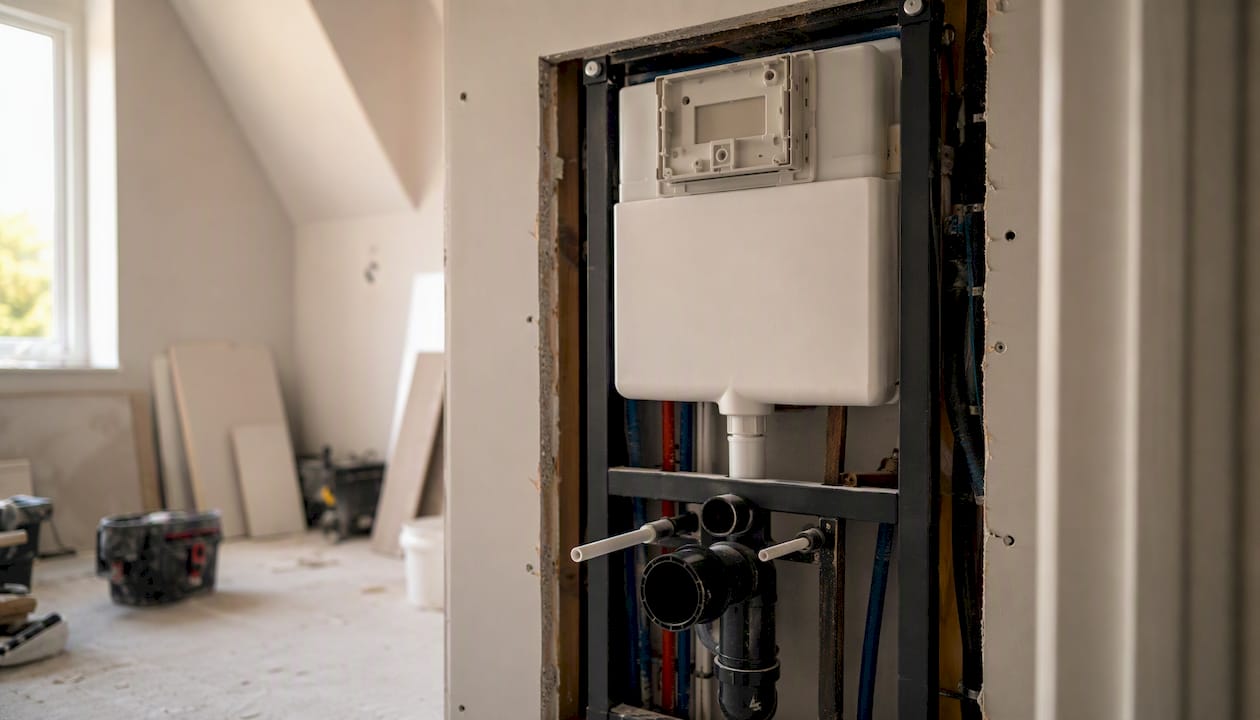
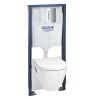
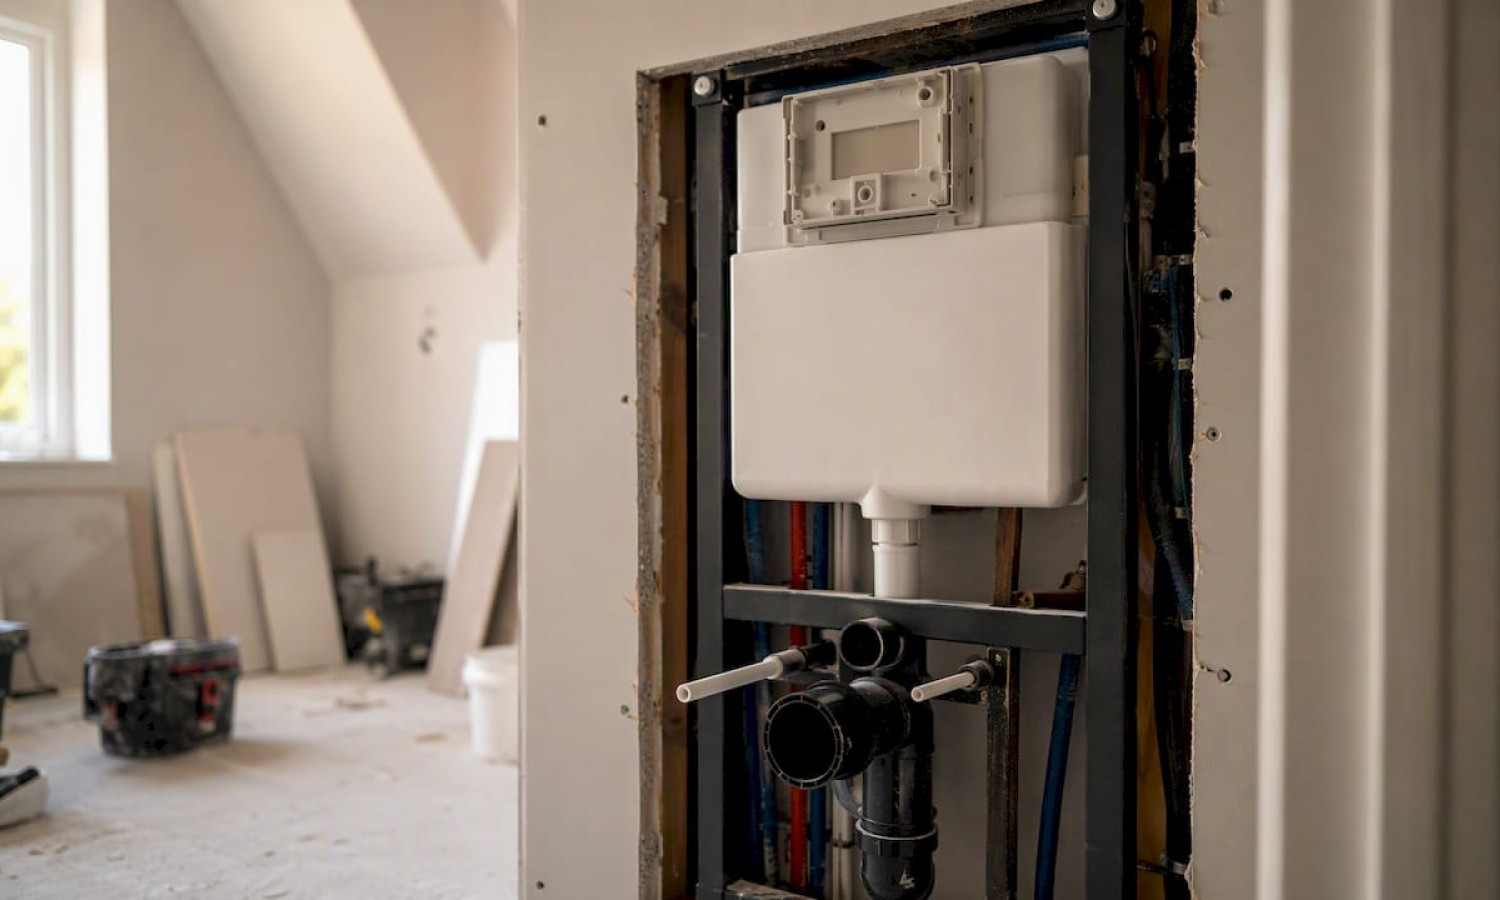
A concealed cistern is a toilet’s flush tank installed inside a wall cavity or furniture unit, leaving only the flush plate visible. According to Beewill, the tank, fill valve, flush valve, float, and overflow are all hidden behind the finished surface. This setup suits new builds and full bathroom renovations best. Retrofit into masonry walls is possible but adds cost and complexity, so weigh that trade-off before committing.
Key Takeaways
A concealed cistern is the practical choice for modern bathrooms where space, cleaning ease, and a clean aesthetic matter, but it requires planned access and a higher upfront budget than a standard close-coupled setup.
| Point | Details |
|---|---|
| Definition | A concealed cistern hides the flush tank inside a wall or furniture unit; only the flush plate is visible. |
| Top benefits | Space gain, easier cleaning, quieter refill, and dual-flush water efficiency are the primary advantages. |
| Biggest trade-off | Repair access and retrofit cost are the main drawbacks; specify an inspection panel at installation time. |
| Installation cost range | Hardware and labor for a new-build stud-wall setup typically cost several hundred to over a thousand dollars combined; masonry retrofit can be significantly more expensive. |
| Santehnikasveikals | Concealed cistern modules, flush plates, and valve components are available at Santehnikasveikals for purchase and delivery. |
Table of Contents
- How does a concealed cistern work?
- Where can you install a concealed cistern?
- What are the main benefits of a concealed cistern?
- What are the disadvantages and risks?
- Installation basics, timeline, and U.S. cost ranges
- How do you maintain and repair a concealed cistern?
- Is a concealed cistern right for your bathroom?
- Cistern vs. water tank: a terminology note
- A practical perspective on concealed cisterns
- Concealed cistern modules and parts at Santehnikasveikals
- Sources
How does a concealed cistern work?
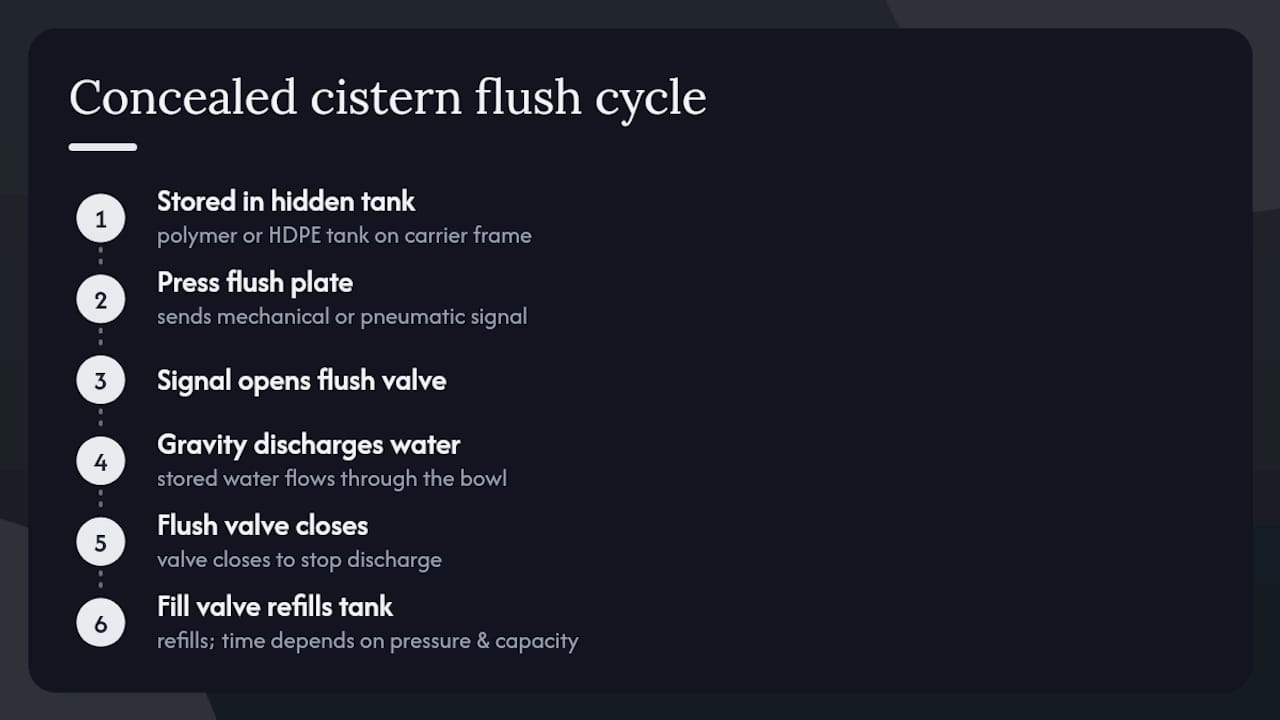
The operating principle is straightforward: water is stored in a hidden polymer or HDPE tank mounted on a carrier frame inside the wall. Press the flush plate, and a mechanical or pneumatic signal opens the flush valve. Gravity drives the stored water through the bowl in a single controlled discharge. The valve closes, and the fill valve refills the tank from the water supply line. The whole cycle takes a short time depending on water pressure and tank capacity.
Main components
| Component | Function | Why it matters |
|---|---|---|
| Polymer/HDPE tank | Stores flush water | HDPE resists long-term corrosion and leaks better than older materials |
| Fill valve | Controls water inlet and shuts off at target level | Faulty fill valves cause running cisterns and wasted water |
| Flush valve | Opens to release water; closes to seal tank | Valve type determines flush volume and reliability |
| Float | Signals fill valve to close at correct water level | Misadjusted float causes overfill or weak flush |
| Overflow | Routes excess water to bowl if fill valve fails | Prevents wall flooding from overfill |
| Carrier frame | Structural support for wall-hung bowl and tank | Must be rated for the combined load of bowl and user |
| Flush plate | User interface; mechanical or pneumatic actuation | Finish and actuation type affect aesthetics and long-term reliability |
Dual-flush systems add a second valve position. A short press releases a partial flush; a full press releases the complete tank volume. The Saniterra manufacturer example describes a delayed-refill design that can save approximately 0.5 liters per flush compared with standard refill timing, with a claimed daily household saving of several liters. Saniterra presents this as an illustrative manufacturer estimate, not a universal figure.
Water savings note: Dual-flush performance varies by valve design, water pressure, and usage habits. Treat per-flush savings claims as directional, not guaranteed. For a broader look at how water-saving toilet features pair with concealed cisterns, that resource covers the key efficiency variables.
Commercial Washrooms notes that most concealed cisterns are designed so valves and fill mechanisms are reachable through the flush plate opening, without cutting into the wall. That design decision matters more than most buyers realize at purchase time.
Where can you install a concealed cistern?
Installation type depends on wall construction, project scope, and the toilet bowl style you are pairing with the cistern.
-
In-wall carrier frame (for wall-hung bowls). The most common setup in new builds and full renovations. A steel carrier frame is fixed to the floor and wall studs, the tank mounts inside the frame, and plasterboard is applied over it. The bowl hangs from the frame’s integral brackets. This requires adequate wall depth, typically 150–200 mm from the finished face.
-
In-wall module for close-coupled bowls. A slimmer module that sits inside the wall but connects to a floor-standing bowl. Victorian Plumbing’s buying guide notes that some manufacturers produce modules as slim as 75 mm depth, making them compatible with narrow stud-cavity walls where a full carrier frame would not fit.
-
Within furniture or cabinet units. The tank is enclosed inside a vanity unit or purpose-built cabinet rather than the wall structure. Access is through a cabinet door or removable panel. This is the most retrofit-friendly option and works on masonry walls where cutting a cavity is not practical.
-
Partial-recess into masonry. A shallow recess is cut into a brick or block wall to accept a slimmer module. More labor-intensive than stud-wall installation; cost and timeline increase accordingly.
Common site conditions and recommended type:
- New build, stud-partition walls: in-wall carrier frame with wall-hung bowl.
- Full gut renovation, stud walls: in-wall carrier frame or slim in-wall module.
- Retrofit, masonry wall, no structural cutting: furniture/cabinet unit.
- Retrofit, masonry wall, partial cutting acceptable: partial-recess module.
- Small bathroom, floor-standing bowl preferred: slim in-wall module or furniture unit.
For structural support requirements and waste-line routing specific to wall-hung installations, the interior plumbing design guide at Santehnikasveikals covers integration points in detail.
What are the main benefits of a concealed cistern?
The most immediate gain is floor and wall space. Removing the exposed tank from the back of the toilet frees 6–8 inches of depth in the toilet zone, which is measurable in a small bathroom. Wall-hung bowls, which pair with in-wall cisterns, also lift the bowl off the floor, making mopping and cleaning the floor area under and around the toilet straightforward. Roper Rhodes Trade Solutions confirms that concealed cisterns simplify cleaning and produce a minimalist look that exposed cisterns cannot match.

Noise reduction is a secondary benefit that often surprises buyers. The wall cavity and plasterboard act as sound insulation around the tank, muffling the refill sound that is audible with a standard close-coupled cistern sitting on the back of the bowl.
Design flexibility is the third practical advantage. Flush plates are available in chrome, brushed nickel, matte black, white, and custom finishes. Tapron’s buyer’s guide notes that both mechanical and pneumatic actuation options exist, with pneumatic systems using air lines that allow the flush plate to be positioned away from the cistern center, useful for non-standard tile layouts.
What are the disadvantages and risks?
- Repair access is limited. Most valve work is done through the flush plate opening, but some repairs require removing tiles or plasterboard, particularly in older or non-standard installations.
- Retrofit into masonry is expensive. Cutting a cavity, reinforcing the structure, and refinishing the wall adds significant labor cost compared with a stud-wall new build.
- Concealed leaks are harder to detect. A slow leak from a faulty fill valve or tank joint can saturate wall insulation before it shows on the surface.
- Higher upfront cost. The carrier frame, module, flush plate, and installation labor together cost more than a standard close-coupled toilet setup.
- Compatibility constraints. Not every bowl pairs with every frame. Confirm bowl-to-frame compatibility before ordering.
Pro Tip: Specify a removable access panel adjacent to the cistern at the time of installation, not as an afterthought. A 300 x 300 mm tile-faced access panel costs little when the wall is open and can save hours of demolition work if a valve needs replacing five years later. Make this an explicit line item in your contractor quote, as recommended by Roper Rhodes Trade Solutions.
The worst-case failure mode is a fill valve that sticks open while the overflow is also compromised. Water then enters the wall cavity rather than the bowl. Specifying HDPE or engineered polymer tanks (not older materials) and using a reputable installer with a documented pressure test on completion reduces this risk substantially.
Installation basics, timeline, and U.S. cost ranges
Installation checklist
- Confirm wall construction type and available depth.
- Check local plumbing codes and permit requirements. The 2026 plumbing regulations guide at Santehnikasveikals covers what builders need to verify before starting.
- Mark waste outlet position and water supply rough-in location.
- Fix carrier frame or module to floor and wall per manufacturer specification.
- Connect water supply line to fill valve inlet.
- Connect waste outlet to drain, confirming trap depth and fall.
- Pressure-test water supply connection before closing the wall.
- Apply plasterboard or tile backer; tile or finish to match bathroom.
- Fit flush plate and set dual-flush volumes per manufacturer instructions.
- Run full flush cycle test; check for leaks at all joints.
Timeline estimates
- New build, stud wall: carrier frame and rough-in plumbing, 2–4 hours; boarding and finishing, 1–2 days (dependent on tile drying time); flush plate fit and test, 1 hour.
- Retrofit, stud wall: add 2–4 hours for removing existing fixtures and patching.
- Retrofit, masonry wall: add 1–2 days for cutting, reinforcing, and refinishing the recess.
U.S. cost ballparks
Labor and material costs vary widely by region, contractor, and project scope. As a general ballpark, in-wall cistern module and carrier frame units range from roughly $300 to $800 for the hardware alone. Professional installation labor for a new-build stud-wall setup typically runs $400–$900. Masonry retrofit work can push total installed cost to $1,500–$3,000 or higher, depending on tile work and wall repair. These are directional figures; get itemized quotes from licensed plumbers in your area.
Questions to ask contractors before signing a quote:
- Is the carrier frame rated for the bowl weight and user load specified by the manufacturer?
- Does the quote include a pressure test and written sign-off before wall closure?
- What access panel options are included, and are they tile-compatible?
- Which flush plate finishes are compatible with the specified module?
- Does the quote cover permit fees and code inspections?
For additional cost-saving plumbing ideas that apply to concealed cistern projects, Santehnikasveikals has a practical reference covering product selection and installation choices that reduce total spend.
How do you maintain and repair a concealed cistern?
Maintenance checklist
- Annually: remove flush plate and visually inspect fill valve, flush valve, and overflow for mineral buildup or wear.
- Every 2–3 years: check water supply isolation valve (usually behind an access panel or under the floor) turns freely.
- As needed: clean flush plate actuator buttons with a damp cloth; check for play or stiffness.
- After any plumbing work nearby: re-test flush cycle and check for leaks at tank connections.
Troubleshooting common problems
| Problem | Likely cause | Quick checks before calling a plumber |
|---|---|---|
| Weak or incomplete flush | Low water level in tank; flush valve not opening fully | Check float adjustment; confirm water supply valve is fully open |
| Cistern runs continuously | Fill valve not seating; float set too high | Listen for hissing after flush; adjust float arm or replace fill valve |
| Noisy refill | High water pressure; worn fill valve | Check inlet pressure; fit a pressure-reducing valve if pressure is high |
| Flush plate stiff or unresponsive | Debris in actuator mechanism; pneumatic line kinked | Remove plate, clean actuator; check air line routing for kinks |
| Damp patch on wall | Slow leak at tank joint or supply connection | Isolate supply; open access panel and inspect all joints |
Commercial Washrooms confirms that most valve and refill components are reachable through the flush plate without wall demolition in properly installed units.
Red flags requiring immediate professional attention:
- Visible water staining on plasterboard or tiles adjacent to the cistern.
- Repeated fill valve failure within 12 months of replacement.
- Any sign of structural movement in the wall around the carrier frame.
Is a concealed cistern right for your bathroom?
Decision checklist
- Project type: New build or full gut renovation? Concealed cisterns are straightforward. Retrofit with masonry walls? Budget for extra labor and wall repair.
- Wall construction: Stud partition? Most modules fit with standard depth. Masonry? Confirm recess feasibility or plan for a furniture unit.
- Budget: Total installed cost higher than close-coupled. Confirm quotes cover frame, module, flush plate, boarding, tiling, and access panel.
- Access plan: Specify flush-plate access plus an adjacent inspection panel at the time of installation.
- Aesthetic priority: Wall-hung bowl with concealed cistern gives the cleanest look. Floor-standing bowl with slim in-wall module is a middle option.
- Plumbing code compliance: Verify local permit requirements before work starts. The plumbing standards compliance guide covers what inspectors typically check for in-wall fixture installations.
Contractor questions for quotes
- What is the frame warranty, and does it cover the tank and valves separately?
- Which access panel options are available, and are they tile-faced?
- Is the flush plate compatible with the specified module, and what finishes are available?
- Does the system support leak-detection accessories or moisture sensors?
- Is pneumatic or mechanical actuation recommended for this installation depth?
Quick suitability summary:
- New build: strong fit, full range of options.
- Full renovation (stud walls): strong fit, plan access panel from the start.
- Retrofit (masonry): viable with furniture unit or partial recess; budget and timeline increase.
- Small bathroom: high value, space gain is most noticeable here.
Cistern vs. water tank: a terminology note
The word “cistern” covers more than toilet plumbing. Wikipedia’s cistern entry defines it broadly as any receptacle for storing water, including large underground rainwater collection tanks and household cold-water storage tanks found in older building systems. In American plumbing, the term “tank” is more common for the toilet’s flush reservoir, which is why “concealed cistern” can sound unfamiliar to U.S. buyers even though the product is widely available. The word derives from the Latin cisterna, itself from cista (a box or chest), and entered English through medieval water-storage usage. In the context of toilet plumbing, “cistern” and “tank” refer to the same component; “concealed cistern” is the standard industry term used by manufacturers and trade guides for the hidden in-wall version.
A practical perspective on concealed cisterns
The single most underestimated decision in a concealed cistern project is not the module brand or the flush plate finish. It is the access strategy. Most buyers focus on aesthetics and water savings, then discover years later that a valve replacement requires a tile saw because nobody specified an inspection panel at installation. The flush plate opening handles routine valve work in most cases, but it is not a substitute for a dedicated access panel when the installation is in a masonry wall or a tiled wet room.
Pneumatic actuation, as noted by Tapron’s buyer’s guide, is worth specifying in installations where long-term mechanical reliability matters more than upfront cost. Pneumatic systems have fewer moving parts at the flush plate itself, which reduces the chance of actuator seizure over years of use.
The other point buyers consistently overlook: confirm bowl-to-frame compatibility before ordering anything. Frame and bowl combinations from different manufacturers do not always align on fixing centers or waste outlet positions. A mismatch discovered on installation day means delays and return shipping. Check the manufacturer’s compatibility matrix, or ask your supplier to confirm the pairing in writing.
Concealed cistern modules and parts at Santehnikasveikals
Santehnikasveikals carries concealed cistern modules, compatible flush plates, and installation accessories for both new-build and retrofit projects. The product range covers in-wall carrier frames, slim modules for stud-cavity walls, and the fill and flush valve components needed for maintenance and replacement work.
Delivery is available throughout Latvia. Browse the full range of plumbing fixtures and bathroom products at Santehnikasveikals, or contact the team directly for product compatibility confirmation and delivery options before placing your order.
Sources
- How Do Concealed Cisterns Work? - Knowledge - Beewill
- Concealed Cisterns Buying Guide | Victorian Plumbing
- What Happens Inside a Concealed Cistern After flushing
- How does a concealed cistern work? | Commercial Washrooms
- Concealed Cistern Buyer’s Guide | Tapron UK
- Cistern - Wikipedia
Оставьте комментарий