















Water Pipe Installation Guide for DIY Homeowners

TL;DR:
- Proper water pipe installation includes selecting correct materials, planning trench depth, and pressure testing connections to prevent leaks. Using the right fittings, tools, and following local codes ensures a reliable system that avoids costly repairs. Pressure testing and careful material handling are essential for a safe, long-lasting residential water supply.
Water pipe installation is the process of selecting, routing, assembling, and securing piping and fittings that deliver water safely and reliably within your home. A proper water pipe installation guide covers far more than just connecting two pieces of pipe. It includes material selection, trench depth, pressure testing, and compliance with local plumbing codes. Common installation techniques include push-fit, soldering, crimping, and solvent welding, each matched to a specific pipe material. Getting these fundamentals right from the start prevents leaks, code violations, and expensive repairs down the road.
What materials and tools do you need for water pipe installation?
Matching pipe material to application is the most critical decision before any cutting or fitting begins. The wrong material in the wrong environment causes premature failure, regardless of how carefully you install it.
Common pipe types and their uses
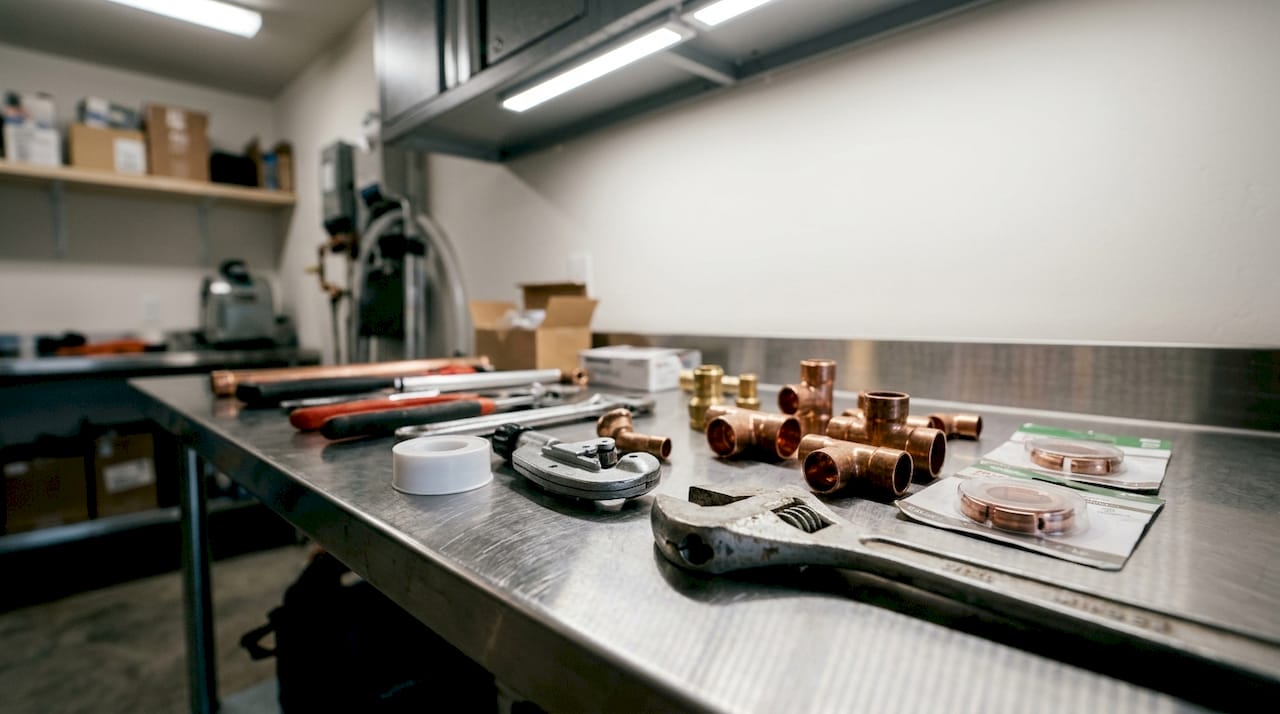
Copper is the traditional choice for hot and cold supply lines. It handles high temperatures, resists corrosion, and lasts decades. The tradeoff is cost and the need for soldering skills or press fittings.
PEX (cross-linked polyethylene) has become the go-to material for residential remodels. It flexes around obstacles, resists freezing better than rigid pipe, and connects with crimp or push-fit fittings without any heat. PEX is color-coded: red for hot, blue for cold.
uPVC (unplasticized polyvinyl chloride) suits cold water supply and outdoor runs. It uses solvent-weld fittings and is lightweight, affordable, and easy to cut. uPVC is not rated for hot water, so never use it on supply lines feeding a water heater.
Each pipe type requires specific compatible connectors and installation methods. Using a copper fitting on a PEX line, or vice versa, voids any warranty and risks leaks.
Essential tools checklist
- Pipe cutter (rotary wheel type for copper, ratchet cutter for PEX)
- Deburring tool or reamer
- PEX crimp tool and go/no-go gauge
- Soldering torch and lead-free solder (for copper)
- Solvent cement and primer (for uPVC)
- PTFE tape and pipe dope for threaded connections
- Pipe wrench and adjustable pliers
- Pressure test gauge
- Safety glasses and work gloves
PTFE tape and pipe dope on threaded connections prevent leaks that stripped or dry threads cause. Always apply PTFE tape clockwise so it does not unwind when you thread the fitting.
Pro Tip: Buy a go/no-go gauge for PEX crimp rings. It costs under $15 and confirms every crimp is within spec before you close up the wall.
Check out the DIY plumbing tools guide from Santehnikasveikals for a full breakdown of what to have on hand before you start.
How do you plan and prepare for installing water pipes?
Planning determines whether your installation passes inspection and holds up for decades. Skipping this phase is the single most common reason DIY plumbing projects fail.
Call 811 before you dig
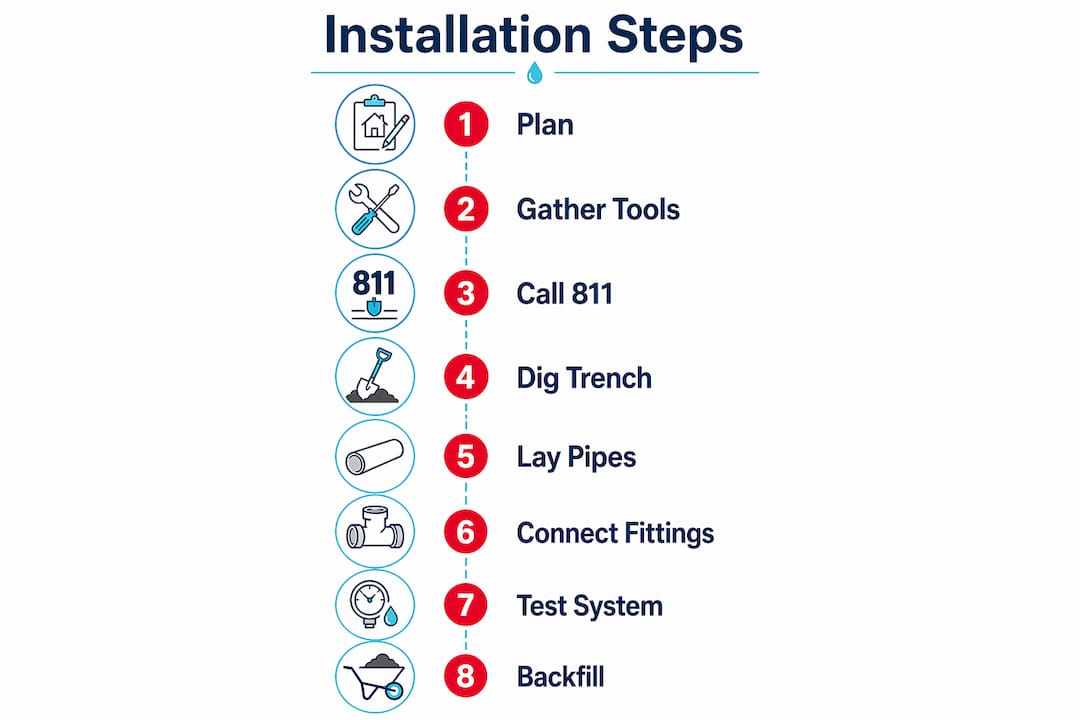
Calling 811 to mark underground utilities is mandatory by law before any excavation. The service is free, and it prevents you from hitting gas, electric, or existing water lines. Utility damage can cause serious injury and result in significant fines. Make the call at least three business days before you plan to dig.
Trench depth and frost line requirements
Water pipes must be buried at least 12 inches below the local frost line to prevent freezing damage. In colder climates, that can mean digging 4 feet or deeper. Always check your local building department for the exact frost line depth in your area before you break ground.
That depth requirement exists because frozen water expands with enough force to split any pipe material. A burst underground line is one of the most expensive repairs a homeowner can face.
Proper trench slopes and backfill also protect buried pipes from soil movement and frost heave over time.
Permits and routing
Most municipalities require a permit for new water supply lines. Pull the permit before you start. An inspector will want to see the open trench and the pressure test before you backfill. Routing the pipe is straightforward: take the shortest practical path, avoid sharp bends, and keep the line away from electrical conduits.
- Plan pipe runs on paper before cutting anything
- Mark the route with spray paint or stakes
- Identify all obstacles: footings, existing drains, electrical conduit
- Confirm local code for pipe material and burial depth
Pro Tip: Photograph your pipe route before backfilling. That photo saves hours of guesswork if you ever need to locate the line for repairs.
Read the 2026 plumbing regulations overview from Santehnikasveikals to confirm which permits apply to your project.
What are the step-by-step instructions for installing water pipes?
A clean, methodical installation process eliminates the vast majority of leaks and failures. Follow these steps in order.
Step-by-step installation process
- Shut off the water supply at the main valve and open a downstream faucet to relieve pressure.
- Measure and mark all pipe runs before cutting. Double-check measurements against your routing plan.
- Cut pipes squarely. Use a rotary pipe cutter for copper and a ratchet cutter for PEX. A square cut is not optional. Uneven cuts damage O-ring seals and cause leaks at push-fit connections.
- Deburr all cut ends. Run a deburring tool or reamer around the inside edge of every cut. Burrs tear O-rings and restrict flow.
- Dry-fit all fittings before committing to any permanent connection. Confirm alignment and direction before soldering, crimping, or cementing.
- Connect fittings by pipe type:
- Copper: Clean with emery cloth, apply flux, heat with a torch, and feed lead-free solder into the joint.
- PEX: Slide the crimp ring onto the pipe, push the fitting fully to insertion depth, and crimp. Verify with a go/no-go gauge.
- uPVC: Apply primer, then solvent cement to both surfaces, push together with a quarter-turn, and hold for 30 seconds.
- Push-fit fittings: Push the pipe fully to insertion depth with a clean, square cut. A partial insertion looks secure but fails under pressure.
- Install shut-off valves at every fixture supply line. This lets you isolate a single fixture without shutting off the whole house.
- Use dielectric unions wherever copper meets galvanized steel. Direct metal-to-metal contact between these two materials causes galvanic corrosion and joint failure.
- Pressure test the system before backfilling or closing walls. Pressurize to 1.5 times working pressure and hold for 15 minutes. Any pressure drop means a leak that must be found and fixed before you proceed.
- Flush and disinfect new lines before putting them into service. Run water until it runs clear, then follow your local code for disinfection, typically a dilute chlorine solution held in the pipe for several hours.
- Backfill the trench with soil free of sharp rocks. Compact backfill in 6-inch lifts to prevent uneven settling that stresses the pipe.
Fitting method comparison
| Fitting type | Pipe material | Skill level | Key requirement |
|---|---|---|---|
| Solder (sweat) | Copper | Intermediate | Clean, dry pipe; lead-free solder |
| Crimp | PEX | Beginner | Correct crimp ring size; go/no-go gauge |
| Push-fit | Copper, PEX | Beginner | Square cut; full insertion depth |
| Solvent weld | uPVC | Beginner | Primer before cement; 30-second hold |
| Threaded | Various | Beginner | PTFE tape; correct torque |
Pro Tip: Test push-fit connections by pulling the pipe back firmly after insertion. If it holds, the collet has engaged. If it slides out, the pipe was not fully inserted.
What common mistakes should you avoid during water pipe installation?
Most plumbing failures trace back to a small number of repeatable errors. Knowing them in advance is the fastest way to avoid them.
- Skipping the deburring step. Burrs on cut pipe ends are the leading cause of push-fit leaks. Burrs damage O-rings and the failure often shows up weeks after installation, not immediately.
- Mixing copper and galvanized steel without a dielectric union. Direct contact between these metals accelerates corrosion at the joint. The pipe looks fine for a year or two, then fails suddenly.
- Patching onto old galvanized or polybutylene pipe. Professional plumbers recommend repiping entire sections rather than splicing new pipe onto old. New connections to legacy pipes often leak immediately at the transition point.
- Skipping the pressure test. A 15-minute pressure test at 1.5 times working pressure catches every leak before you bury or cover the pipe. Skipping it means discovering leaks after the wall is closed or the trench is filled.
- Reusing push-fit fittings too many times. Reusing push-fit fittings beyond 3–4 disconnections compromises the internal seals. Buy new fittings when you need to reconnect.
- Ignoring local code. Code requirements exist for trench depth, pipe material, venting, and inspection. Violations can require tearing out finished work.
Pro Tip: After completing all connections and before the pressure test, walk every joint and visually confirm each fitting is fully seated. Five minutes of checking saves hours of leak hunting.
For more on protecting buried pipe from temperature extremes, the pipe insulation guide from Santehnikasveikals covers material options and installation practices.
Key takeaways
Successful water pipe installation depends on matching materials to application, preparing the trench correctly, and pressure testing every connection before covering your work.
| Point | Details |
|---|---|
| Match materials first | Choose copper, PEX, or uPVC based on temperature rating and local code before cutting anything. |
| Call 811 before digging | Utility marking is free, legally required, and prevents dangerous and costly accidents. |
| Cut square, deburr always | Angled cuts and burrs destroy O-ring seals and cause delayed leaks in push-fit fittings. |
| Pressure test before backfill | Test at 1.5 times working pressure for 15 minutes to confirm zero leaks before closing up. |
| Use dielectric unions | Always separate copper from galvanized steel to prevent galvanic corrosion at the joint. |
What I’ve learned from watching DIY pipe jobs go wrong
I have reviewed a lot of residential plumbing projects, and the failures almost always share one trait: the homeowner treated the job as a series of isolated steps rather than a connected system. They cut the pipe correctly, seated the fitting correctly, and still ended up with a leak, because they used a PEX crimp ring sized for a different brand’s fitting, or they connected new copper directly to an old galvanized line without a dielectric union.
The biggest shift in thinking I can offer is this: plumbing is a system, not a collection of parts. Every material choice affects the next connection. Every fitting type has a specific insertion depth, a specific ring size, and a specific tool. Treating push-fit fittings as universally interchangeable is the mistake I see most often. They look identical across brands, but the internal geometry differs enough to cause seal failures.
My honest advice on the DIY versus professional question is straightforward. If you are running a new PEX line to a single bathroom fixture, do it yourself. If you are tying into an existing galvanized main or working near the meter, call a licensed plumber for that connection and handle the rest yourself. The cost of one professional joint is far less than the cost of a failed connection inside a finished wall.
Pressure testing is the one step I would never skip, even on a two-foot repair. A 15-minute test costs nothing and catches everything. Skipping it is the only truly unforgivable mistake in residential plumbing.
— Renate
Santehnikasveikals has everything you need for your pipe project
Getting the right materials before you start is what separates a clean installation from a frustrating one. Santehnikasveikals stocks a wide selection of pipes, fittings, shut-off valves, and installation tools suited for residential plumbing projects of every scale.

Whether you are running new PEX lines through a bathroom remodel or replacing an outdoor supply line, the Santehnikasveikals store carries the materials and fittings you need, with delivery available across Latvia. The product catalog includes options for copper, PEX, and uPVC systems, along with the connectors, sealants, and pressure testing equipment that complete a professional-quality installation.
FAQ
What is the best pipe material for residential water supply?
PEX is the most practical choice for most residential renovations. It flexes around obstacles, resists freezing better than rigid pipe, and installs with crimp or push-fit fittings without soldering.
How deep should water pipes be buried?
Water pipes must be buried at least 12 inches below the local frost line. In colder climates, that depth can exceed 4 feet, so always confirm the requirement with your local building department.
Do I need a permit to install water pipes?
Most municipalities require a permit for new water supply lines. Pull the permit before starting work, as an inspector will need to verify the open trench and pressure test before you backfill.
How do I test water pipes for leaks before backfilling?
Pressurize the system to 1.5 times working pressure and hold for 15 minutes. Any drop in pressure indicates a leak that must be located and repaired before you cover the pipe.
Can I connect copper pipe to galvanized steel directly?
No. Connecting copper directly to galvanized steel causes galvanic corrosion at the joint. Always use a dielectric union between these two metals to prevent premature failure.
Recommended
- Must-Have Plumbing Tools for DIY Homeowners in 2026 | Santehnikasveikals.lv
- What Is Pipe Insulation and Why Your Home Needs It | Santehnikasveikals.lv
- Drainage System Troubleshooting Steps for Homeowners | Santehnikasveikals.lv
- Plumbing Regulations 2026: What Builders Must Know | Santehnikasveikals.lv
Оставьте комментарий